Page d'Accueil
- POV-Ray Tutorial
- Exemples POV-Ray
Table des matières
- Géométrie
- Architecture
- Maison part 1
- Maison part 2
- Maison part 3
- Toit
- Tour
- Châteaux
- Fenêtre + Porte
- Escaliers
- Pyramide
- Colonne
- Arc, Arche
- Clôtures
- Meubles
- Ménage
- Technique
|
|
Maison - part 2
Objets: "box", "plane".
Méthodes: "difference", "union", "#declare"
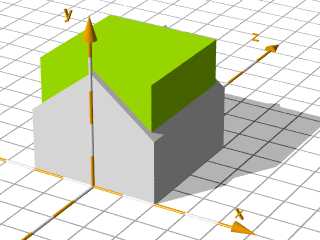
La Constuction d'une maison
(intérieur creusé, le toit)
Le creux del'intérieur della maison on fait avec un parallélépipède rectangle
un peu plus petit que le solide della casa ici avec la "difference":
La forme de base de la maison moins la forme del'intérieur.
Un ficher include pour utiliser cet objet comme un objet prêt à l'usage vous pouvez trouver
sur mon site Objets POV-Ray.
|
//-------------------------------------
#declare Wall_Texture_1 =
texture{ pigment{color rgb<1,1,1>*1.1}
         normal {bumps 0.5 scale 0.005}
         finish {diffuse 0.9}
       } // end of texture
#declare Wall_Texture_2 =
texture{ pigment{color  rgb<1,1,1>*1}
         finish {diffuse 0.9}
        } // end of texture
//-------------------------------------

#declare Wd = 0.20 ; // épaisseur du mur

//  creuser l'intérieur
difference{ //-------------------------
box { <-Hx,0,0>,< Hx,Hy,Hz>
      texture { Wall_Texture_1}
    } // end of box -------------------
plane{ <0,-1,0>,0
       texture { Wall_Texture_2}
       rotate<0,0,Roof_Angle>
       translate<0,Hy,0>
     } // end of plane ----------------
plane{ <0,-1,0>,0
       texture { Wall_Texture_2}
       rotate<0,0,-Roof_Angle>
       translate<0,Hy,0>
     } // end of plane ----------------
 // le creux interieur:
box { <-Hx+Wd,0.10,Wd>,<Hx-Wd,Hy,Hz-Wd>
      texture {Wall_Texture_2}
     }
}// end of difference ----------------- |
|
|
|
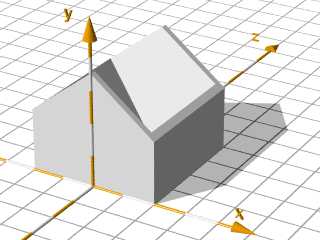
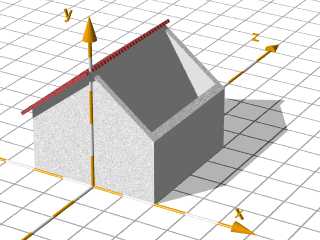
Le toit:
Les partie del toit sont formée de deux boîte mince, tournées avec l'angle du toit
et poussées à l'hauteur du pignon.
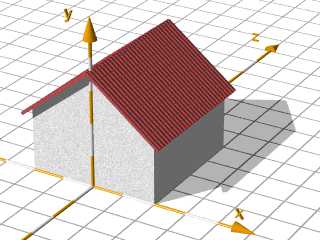
#declare Roof_Texture= // toit
// layered textures
// superposition des textures
texture{
  pigment{color rgb<.55,.09,.09>*1.3}
  normal {gradient z scallop_wave
                     scale<1,1,0.15>}
  finish { diffuse 0.9}
} // end of texture 1 ----------------
texture{
  pigment{
      gradient x
      color_map{
      [0.00 color rgbt<1,1,1,1>]
      [0.90 color rgbt<1,1,1,1>]
      [0.95 color rgb<1,1,1>*0.1]
      [1.00 color rgb<1,1,1>*0.1]}
      scale 0.25}
  finish { diffuse 0.9}
} // end of texture 2 ----------------
//--------- fin de texture
#declare Roof_D = 0.10;//spessore tetto
#declare Roof_O = 0.20;// sporto
#declare Roof_L=Hx+0.8;//esperimento!!

// le toit:
box{  // toit à gauche
 <-Roof_L,       0,  -Roof_O>,
 < Roof_D/2,Roof_D,Hz+Roof_O>
 texture{ Roof_Texture
          translate<-0.05,0,0>}
 rotate<0,0, Roof_Angle>
 translate<0,Hy,0>
}
box{ // toit à droite
 <-Roof_L,        0,  -Roof_O>,
 < Roof_D/2, Roof_D,Hz+Roof_O>
 texture{ Roof_Texture
          translate<-0.05,0,0>}
 rotate<0,0, Roof_Angle>
 translate<0,Hy,0>
 scale<-1,1,1> // reflété x
}
//----------------------- fin du toit |
|
|
Objets prêt à l'usage pour POV-Ray comme
fichiers include avec fichiers exemple
on peut trouver sur la POV-Ray Objects page.
|